Pre-requirement
Before installing Jenkins and all setups, you need to have:
GitJDK1.8DatabaseGithub ssh certification(Steps)
to be installed on your server.
1. Jenkins Installation
To install Jenkins on a Linux machine, you can refer to the official documentation for the most up-to-date and detailed steps: Jenkins Official Installation Guide.
2. Jenkins Configuration
Once Jenkins is installed:
-
Start Jenkins service:
sudo systemctl start jenkins -
Open a web browser and navigate to
http://your_server_ip:8080. -
You will be prompted to enter the initial admin password, which can be found in the file
/var/lib/jenkins/secrets/initialAdminPassword. -
Complete the post-installation setup wizard by selecting the suggested plugins or selecting specific ones based on your needs.
3. Jenkins Plugins Installation
Jenkins has a vast ecosystem with a wealth of plugins:
- Go to the Jenkins dashboard.
- Click on "Manage Jenkins" and then "Manage Plugins".
- Navigate to the "Available" tab to see the list of all the plugins that you can install.
- Search for the plugin you want and select it.
- Click on "Install without restart" or "Download now and install after restart".
For the purpose of this documentation, you might consider plugins like "GitHub", "NodeJS", and others relevant to your project.
4. Jenkins Project Configuration
-
Creating a New Job:
- From the Jenkins dashboard, click on "New Item".
- Name your project, choose "Freestyle project", and click "OK".
-
Source Code Management:
- Under the job configuration, go to the "Source Code Management" section.
- Choose "Git" and provide your repository URL.
-
Build Triggers:
- Choose "GitHub hook trigger for GITScm polling" to allow builds to be triggered by the GitHub webhook.
-
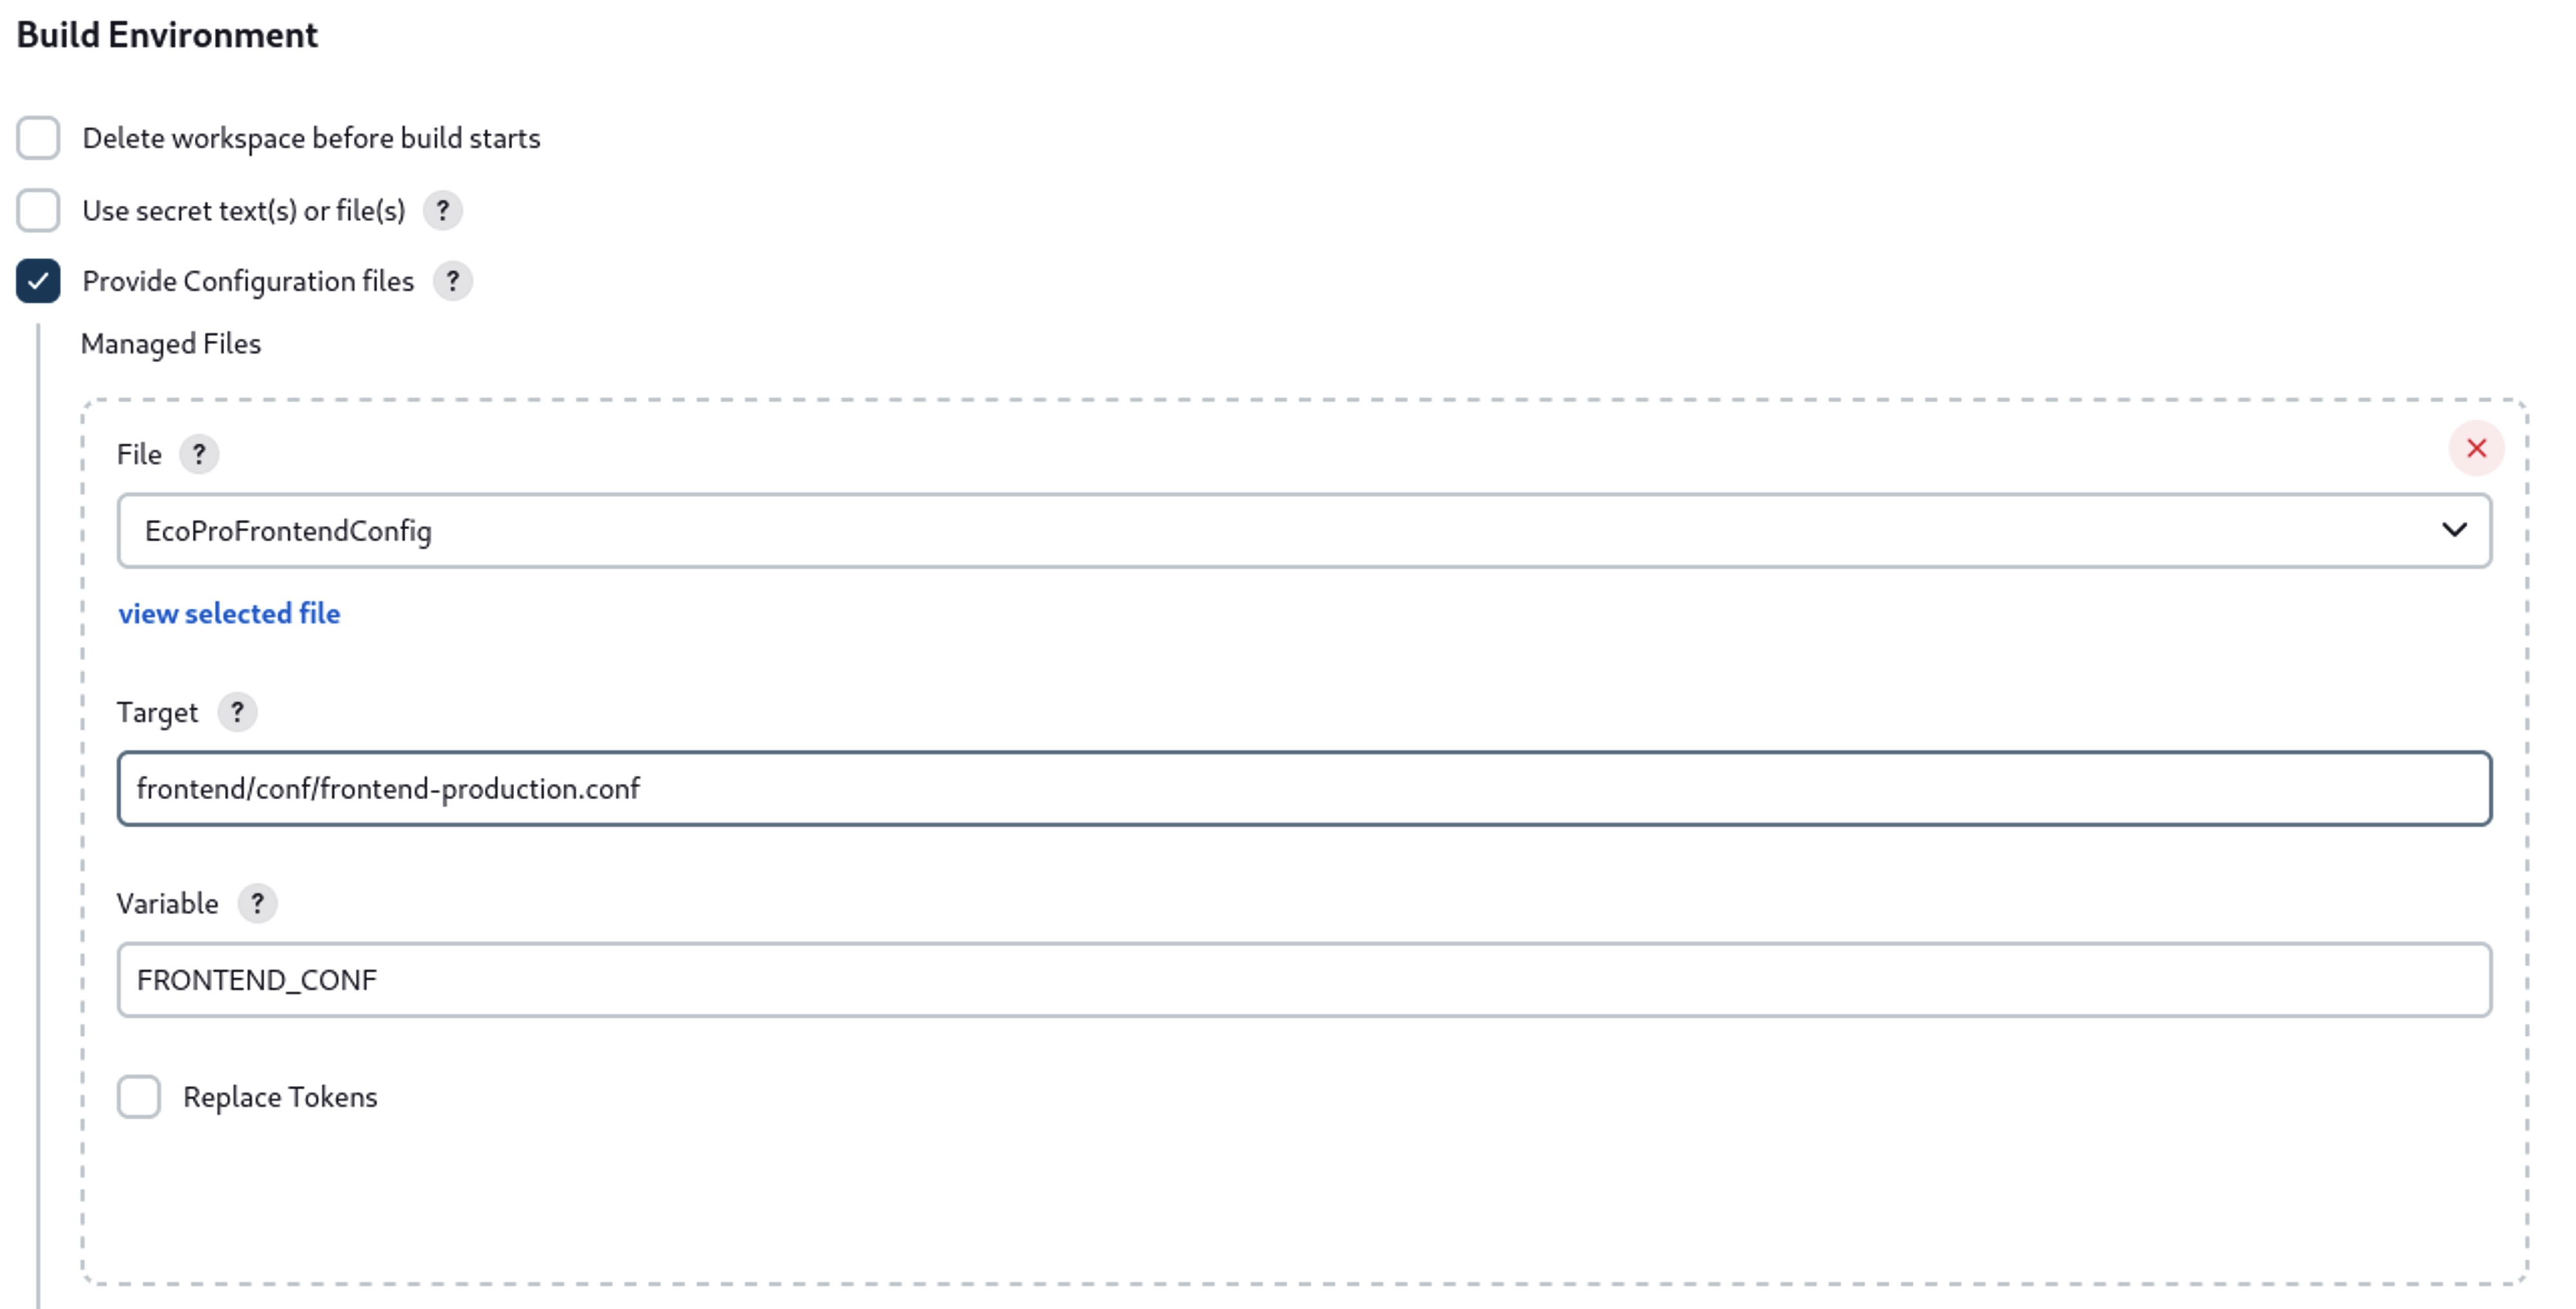
Build Environment: Since the .evn file is not on Github repository, so we need to add it to Jenkins workspace through Configuration File.
- Navigate to Navigate -> Manange Jenkins -> Managed files section.
- Click on "Add a new config" and choose the file type you want (for ecoPro we use "Properties file").
- Add a name for this file and write down the contents of the file you need in the box.
- After these two files are created, go back to Jenkins Configure.
- Under the "Build Environment" section, choose "Provide Configuration Files", and add your files as following:
-
Build Steps:
-
Navigate to the "Build Steps" section.
-
Click on "Add build step" and choose the type of build step you want (e.g., "Execute shell").
-
In the provided shell box, write down the commands/scripts you want to be executed. The first shell is to build and compile the project, for EcoPro we use:
cd $WORKSPACE/frontend
sbt compile
sbt stage
The second shell is to run the project:
#!/bin/bash
cd $WORKSPACE/frontend/target/universal/stage

rm -f RUNNING_PID

FRONTEND_PID=$(lsof -t -i:9038) || true
if [ -n "$FRONTEND_PID" ]; then
    kill -9 $FRONTEND_PID
fi

BUILD_ID=dontkillme
nohup bin/frontend_ecopro -Dhttp.port=9038 -Dconfig.resource=frontend-production.conf > ./app.log 2>&1 &
-
-
Post-build Actions:
- You can add actions to be taken after the build completes, like archiving artifacts, sending notifications, etc.
5. GitHub Webhook Configuration
- Navigate to your GitHub repository.
- Click on "Settings" and then "Webhooks".
- Click on "Add webhook".
- Provide the Payload URL as
http://your_jenkins_server_ip:8080/github-webhook/. - Choose content type as
application/json. - Select the events you want the webhook to listen for (e.g., "Just the push event").
- Click on "Add webhook".